The current version of the MICO platform is 3.1.0 (changes) and is available as:
Virtual machine image
The virtual machine image provides a ready-to-use installation of the platform and can be downloaded as Open Virtualization Format (OVF). This format is supported by most current virtualization software. We recommend the use of VirtualBox.
The image is not intended for use in public or untrusted environments! The reason is that there are no safeguards against unauthorized (remote) access.
All platform services get started on boot. The extractor pipelines can be started using the configuration Web interface. See below for first steps.
The default user and password for accessing the MICO platform services is mico.
The provided virtual machine image comes with preconfigured port forwardings:
- 22080 → 80 (MICO platform overview page)
- 22022 → 22 (SSH; Username: user, Password: user)
- 8080 → 8080 (Tomcat: Broker, Marmotta and pipeline configuration webinterface)
- 5672 → 5672 (RabbitMQ)
- 15672 → 15672 (RabbitMQ administrative webinterface)
- 8020, 50010 → 8020, 50010 (HDFS: Hadooop Distributed Filesystem)
Extractors and pipelines
The following extractor pipelines are available:
- Face detection in images
- Face detection in video key-frames
- Animal detection in images
- Temporal video segmentation (This extractor is not for public available. Contact us, if you are interested.)
First steps
The URL of the overview page and the provided services depends on your network configuration. In the first step you should configure the DNS resolver of the computers from wich you access the MICO platform. For Windows open the file %systemroot%\system32\drivers\etc\hosts (where %systemroot% depends on you local configuration, but typically is c:\windows), on *nix systems it is /etc/hosts (make sure you have administrative privileges) and insert a line with the hostname of the machine the MICO platform runs on followed by its external IP adress. If you run the virtual machine image on your local computer this will look like:
mico-platform 127.0.0.1
Then start a browser and go to the overview page http://<mico-platform-hostname>/ (or http://mico-platform:22080/ if you use the virtual machine on your local computer). Something like the following should show up:

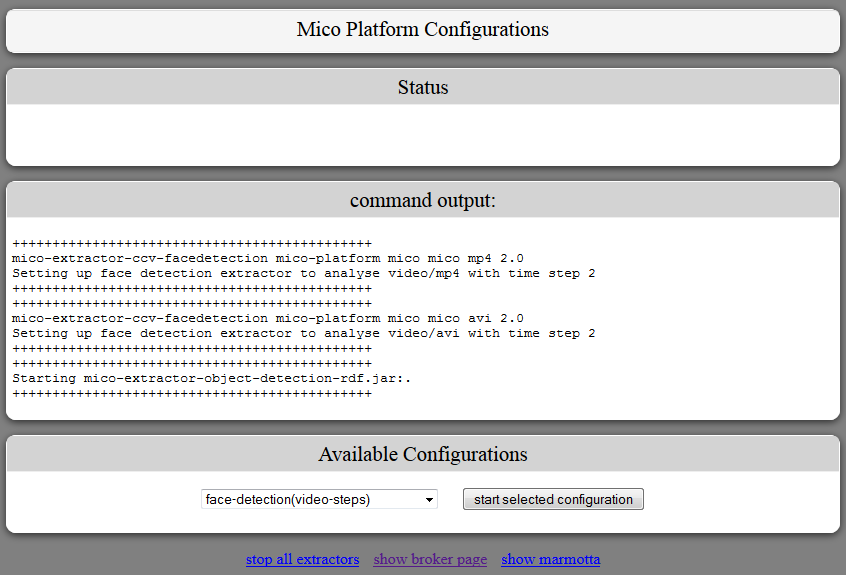
Go to the pipline configuration page and start an extractor pipeline: http://<mico-platform-hostname>:8080/mico-configuration/
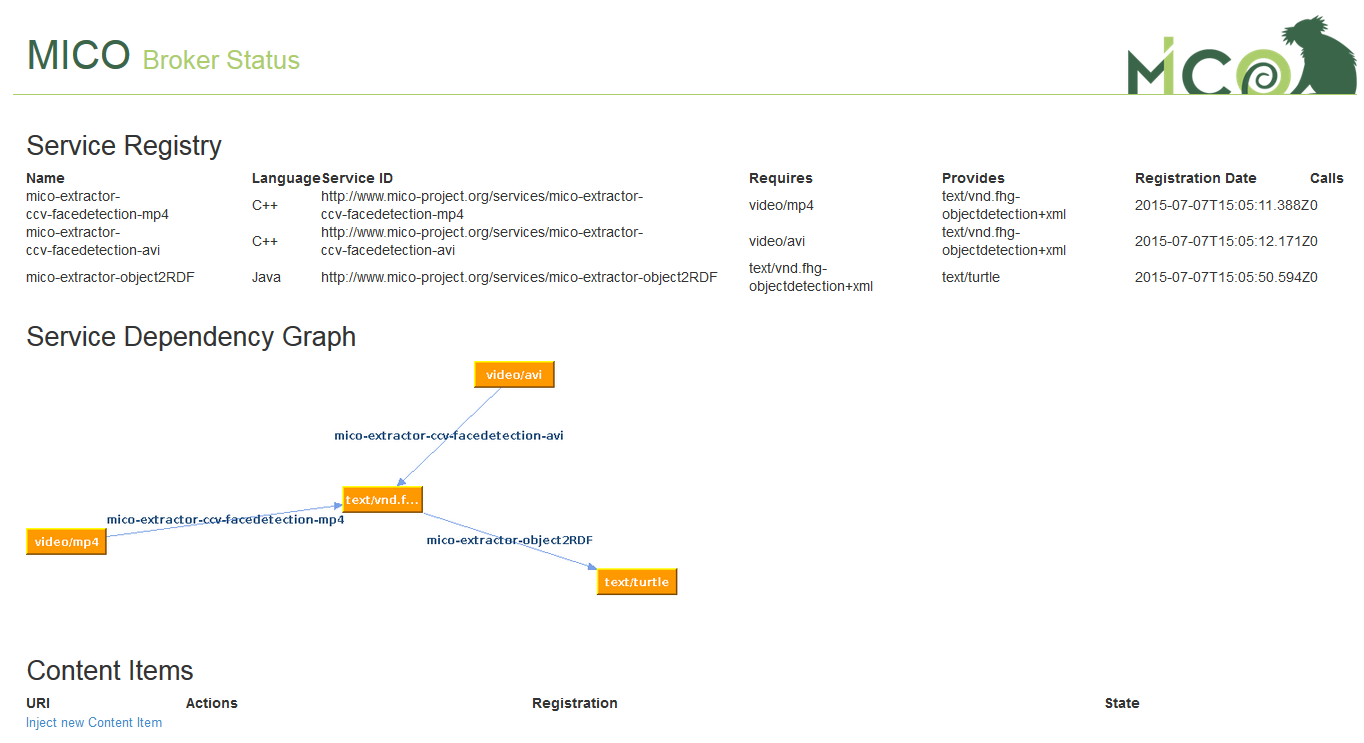
Now switch to the broker status page http://<mico-platform-hostname>:8080/broker/ where you can see the pipeline graph:
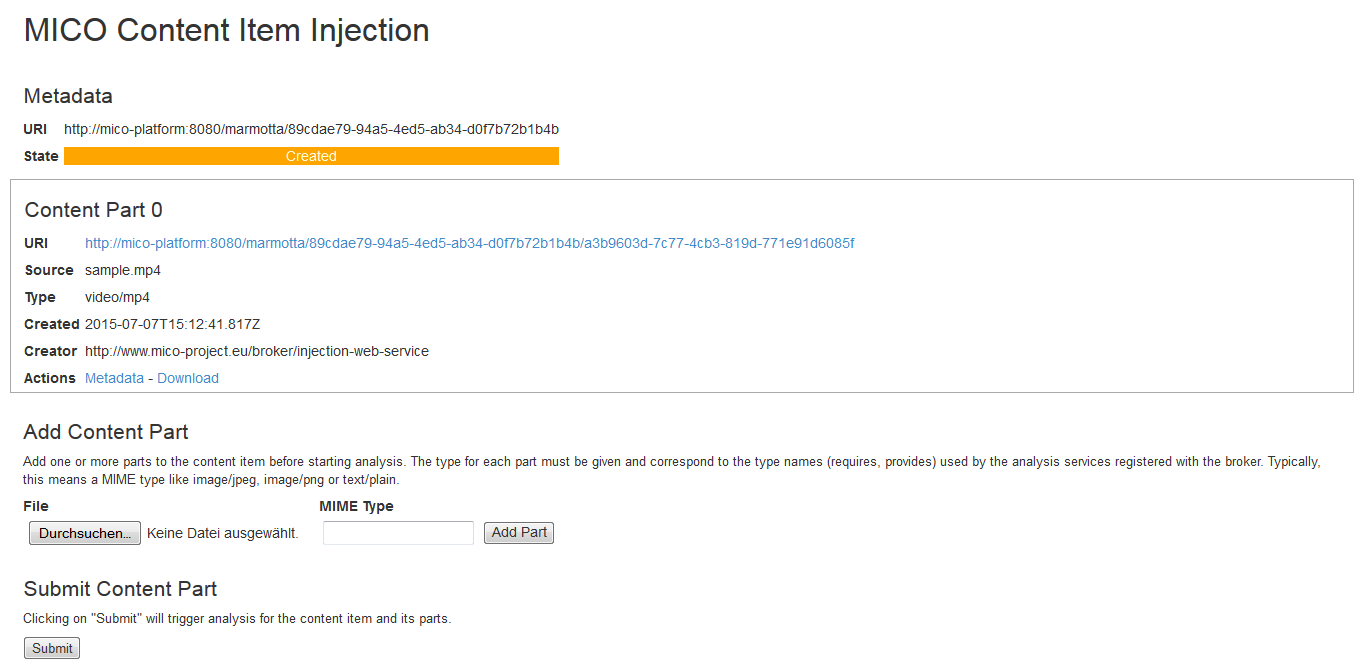
At the bottom of the broker status page you can find the link to inject new content item at the bottom of the page. When you go there and click create new, you will be asked to upload a file that can be processed by the current active extractor pipeline:
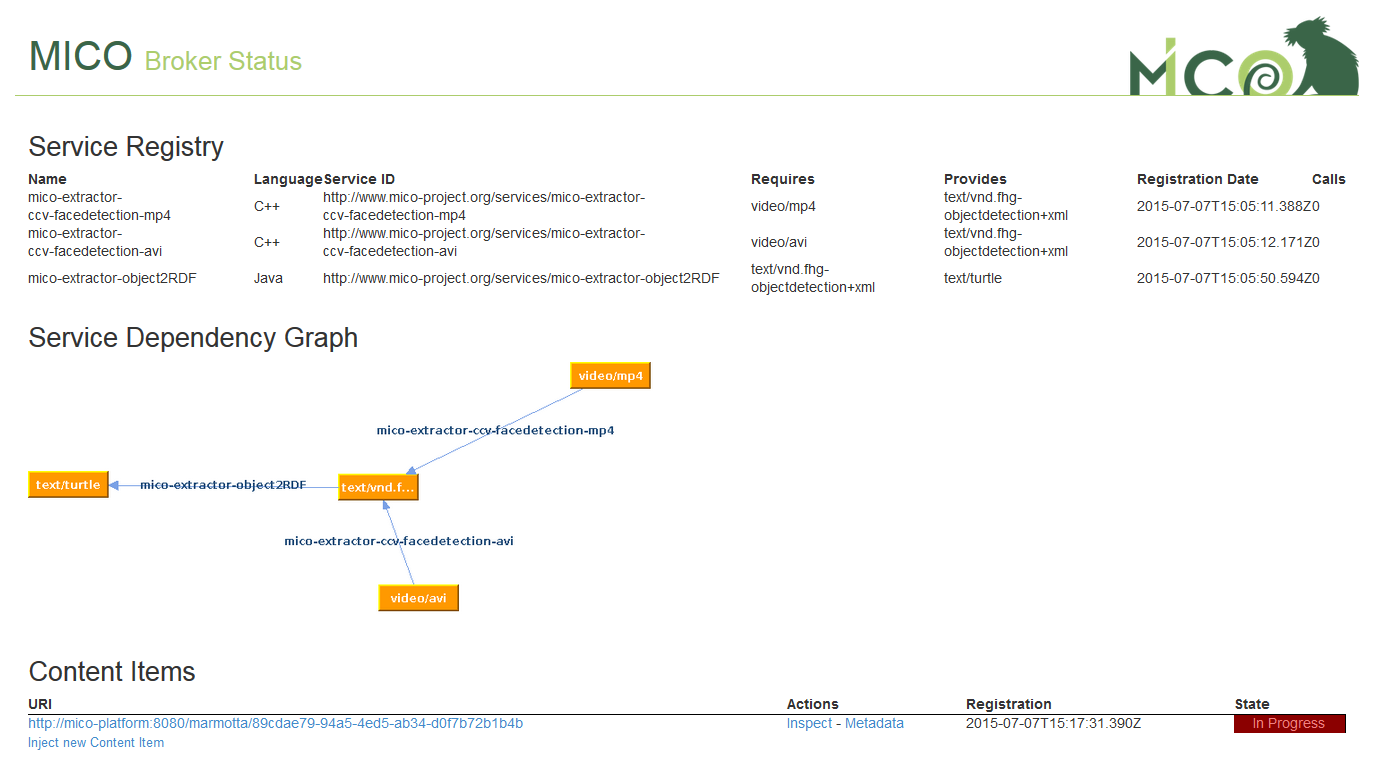
When you click submit and go back to the broker status page http://<mico-platform-hostname>:8080/broker/ you can see the state of the extraction process and examine the uploaded data and when the extraction process has finsished the results:
Pipeline configuration
For ease of use, we developed a webinterface where you can start and stop the preconfigured extractor pipelines.